
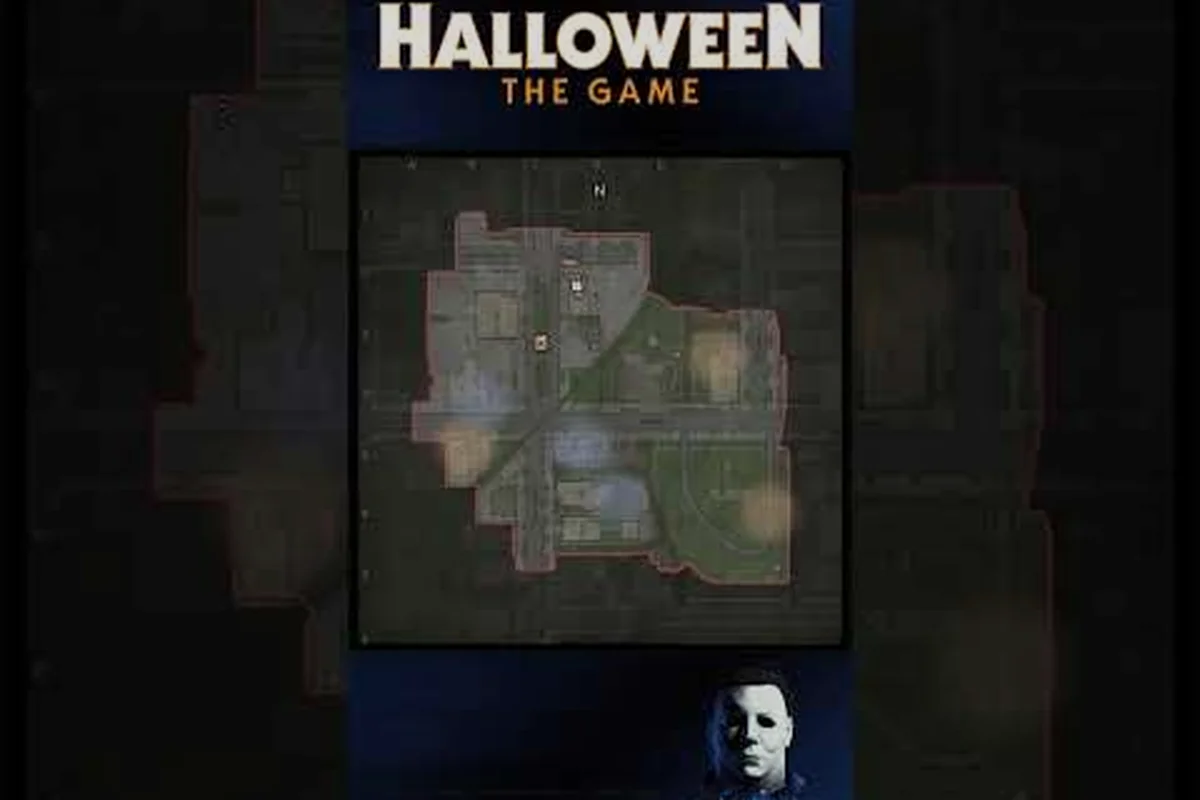
Map knowledge in Halloween: The Game is the single biggest factor separating a quick victim from a final survivor. The 1978 Haddonfield neighborhood is a compact but layered sandbox where street lines, house layouts, and escape route timing decide whether Michael Myers catches you in the open or loses you around a fence. This guide breaks down the full Halloween: The Game maps system, covering landmark callouts, dynamic map features, and the highest-percentage escape routes that veteran players rely on.
The Core Haddonfield Map Layout
Halloween: The Game maps are built around a single primary environment: the residential streets of Haddonfield as they appeared in the 1978 film. The official IllFonic in-game map video confirms the neighborhood is designed as an asymmetrical 1v4 sandbox, with one player controlling Michael Myers while up to four heroes attempt to survive, rescue families, or escape. Understanding the overall geometry matters because every chase, ambush, and escape path flows through the same street grid.
Street Structure and Landmark Zones
The Haddonfield map is organized around a central residential grid with several distinct sub-zones. The main street corridor runs north to south, connecting the Doyle house on the upper end to the Wallace residence near the lower block. Side streets branch east and west, creating natural chokepoints at intersections where Michael can cut off fleeing heroes. The hedge maze behind the elementary school creates one of the few true loops on the map, letting a knowledgeable hero break line of sight for several seconds.
| Map Zone | Primary Landmarks | Chase Risk | Escape Potential |
|---|---|---|---|
| North Residential | Doyle house, picket fences | High (open yards) | Medium (backyard gates) |
| Central Streets | Intersections, parked cars | Very High (long sightlines) | Low (few vaults) |
| School Grounds | Hedge maze, playground | Low (tight corners) | High (multi-route exits) |
| South Block | Wallace residence, sheds | Medium (fence gaps) | High (basement access) |
Each zone carries a distinct rhythm. The central streets are the most dangerous because Michael can track a sprinting hero across two full blocks before the hero reaches meaningful cover. Conversely, the school grounds reward heroes who know the hedge maze layout well enough to double back without hitting a dead end.
Dynamic Map Features That Change Each Match
What makes Halloween: The Game maps feel alive is the layer of dynamic elements that shift match to match. Police patrol routes escalate over the course of a round, meaning a street that was safe in the first three minutes may become a flashing-blue hazard zone later. Weapon spawns are randomized within predefined household locations, forcing heroes to adapt their routing rather than memorizing one static loot path. Phone locations also rotate among several houses, which prevents survivors from always funneling to the same objective building.
These dynamic features create what the community describes as map pressure — the sense that no single route stays optimal for an entire match. A hero who learns the Haddonfield streets guide thoroughly will still need to re-evaluate each block based on where police cars are staging, which houses have lit windows, and whether Michael has broken any fences since the round started.
All Maps and Variants in the Current Build
As of the current early-access window, the Halloween: The Game map list contains one primary Haddonfield neighborhood map with several distinct sub-areas rather than multiple standalone maps. The official Steam page describes the 1978 suburban setting as the central stage for all matches, with the dynamic features providing variety instead of separate map rotations. Players coming from other asymmetrical horror games should understand that mastery here is about depth, not breadth — learning every house interior, fence gap, and sightline break on one dense map.
Interior Layouts and Hiding Spots
House interiors are where the map guide earns its value. Each accessible home in Haddonfield follows a general template — front door, kitchen, living room, hallway, and either a basement or upper floor — but the furniture placement and door positions vary by residence. The Doyle house features a narrow staircase that creates a natural bottleneck, while the Wallace residence includes a basement with a single exit that doubles as a high-risk hiding spot.
| House | Floors | Key Feature | Best Hiding Spot | Risk Factor |
|---|---|---|---|---|
| Doyle | 2 | Narrow staircase | Upstairs closet | Medium |
| Wallace | 2 + basement | Single basement exit | Basement shelf nook | High |
| McKenzie | 1 | Open floor plan | Kitchen pantry | Low |
| Elementary | 1 + annex | Hedge maze access | Supply closet | Medium |
Heroes should treat every hiding spot as temporary, not permanent. Michael players learn common hiding positions quickly, and the longer a hero stays still, the more likely the killer will check that exact corner. The strongest use of hiding spots is mid-chase — breaking line of sight, slipping into a closet, and letting Michael run past before doubling back toward an exit.
Understanding Escape Routes by Zone
The phrase "escape routes" in Halloween: The Game covers two distinct mechanics: reaching a map edge exit point, or surviving until the match timer ends with enough objectives completed. Each zone offers different exit accessibility. The school grounds provide the most flexible exit paths because the hedge maze has three separate openings that feed into different residential streets. The north residential area funnels heroes through backyard gates that can be blocked by Michael if he positions correctly.
A reliable escape sequence on the south block looks like this: exit the backyard through the southeast gate, hug the fence line past the parked sedan to break line-of-sight from the Myers house window, then cut through the narrow gap between the hedges toward the southern sidewalk. The south block is one of the few zones where the Killer's line-of-sight is consistently broken by the low stone wall and dense shrub rows, giving Survivors roughly 2–3 extra seconds of hidden movement before a chase can re-engage. Because the streetlights on this stretch are spaced further apart than on the north side, staying in the darker patches near the fence lets you reach the map's south exit without triggering the motion-sensitive porch lights that reveal your position.
-
Approach the Wallace residence from the alley side, not the street.
-
Check the basement window for a weapon spawn before committing to the interior.
-
Exit through the back shed into the side yard, which breaks line of sight from the street.
-
Use the fence gap near the property line to reach the adjacent block.
-
Head toward the school hedge maze if police patrols have not yet sealed the central streets.
This route works because it chains multiple sightline breaks together rather than relying on a single juke. On Haddonfield’s Lampkin Lane corridor, a survivor can loop from the Doyle house backyard through the hedge gap, past the fence by the Myers house spawn, and into the shed near the sidewalk — each transition forces Michael to break line-of-sight and burn his stalk meter while reacquiring visual contact. Even if he guesses the general direction, those repeated reacquisitions cost roughly two to three seconds per break, which stacks into enough time for a survivor to reach the next window vault or palette before the kill animation can connect.
Haddonfield Map Guide for New and Returning Heroes
New players often make the mistake of treating the Haddonfield map like a sprint track, running in straight lines toward objectives or exit markers. Experienced heroes instead move in angled segments — short bursts from one piece of cover to the next, always keeping a structure between themselves and the last known position of Michael. This Haddonfield map guide focuses on the habits that keep you alive longer, not just the memorization of street names.
Reading Police Patrol Routes and Escalation
Police patrol routes are one of the most underrated dynamic systems on the map. Early in a match, patrol cars stay on the perimeter streets, leaving the interior blocks relatively quiet. As the round progresses, those routes push inward, and the police presence can actually work against heroes — drawing attention, lighting up dark corners, and sometimes pushing Michael toward the same paths survivors are using. According to community data, heroes who track patrol timing can predict which streets become unsafe around the four-minute mark.
The escalation pattern typically follows three stages: the quiet approach (no survivor noise, the Shape stalks between map landmarks like the Doyle House and Lampkin Lane fences), the trigger stage (a failed skill check, a slammed door, or a sprinting survivor raises his Focus meter), and the hunt phase (the Shape breaks into a chase, and police patrol routes shift toward the last known ping on Haddonfield streets). Understanding this progression matters because each stage changes which escape routes remain safe—cutting through backyards works in the quiet approach but funnels you into dead-end fences once the hunt phase locks the Shape onto your trail.
-
Stage one (0–3 minutes): perimeter patrols only, interior streets quiet, best window for cross-map movement.
-
Stage two (3–6 minutes): patrol cars enter central intersections, chokepoints become dangerous, heroes should favor alleys and backyards.
-
Stage three (6+ minutes): full neighborhood coverage, most exit routes contested, hiding and objective play gain value over sprinting.
Understanding this escalation turns the map into a clock. On Haddonfield, the central streets—especially the stretch between Lampkin Lane and Meridian Avenue—become kill zones once patrol density peaks around the mid-match phase, as Michael can lock down both sidewalk escape routes from a single vantage point near Doyle House. Heroes who recognize this timing can push cross-map rotations through Orange Grove Avenue or the backyard fences early, while late-game survival depends on abandoning the center entirely and cycling through safer perimeter zones like Maple Street and the parking lot exits, where line-of-sight breaks and generator objectives still offer viable escape windows.
Weapon Spawns and Phone Locations
Weapon spawns are randomized within a fixed set of household locations, and knowing the full spawn table matters because heroes start with minimal self-defense options. The most common spawn points are kitchens, basements, and sheds — locations that also happen to be high-traffic areas for Michael, creating a risk-reward tension. Grabbing a weapon means entering a building that the killer is likely to check, but leaving it means having no answer when the chase begins.
Phone locations are similarly rotated among a handful of houses. The phone is the primary objective for calling in outside help, and its position changes every match. Heroes who memorize all potential phone houses can plan objective routes that avoid crossing the entire map, while Michael players who know the same locations can set ambushes along the most efficient paths. This symmetrical knowledge is what separates the Halloween: The Game maps system from a static environment.
Advanced Strategies for Michael on the Haddonfield Map
Michael Myers benefits from the same map knowledge that helps heroes, but he applies it differently. Instead of escaping, Michael uses map geometry to control space — cutting off rotations, predicting objective attempts, and forcing heroes into the most dangerous zones on the block. A Michael player who understands the Haddonfield streets guide can make the map feel half its actual size.
Map Control and Rotational Pressure
The strongest Michael strategy is zone denial rather than direct pursuit. By holding a central intersection or a key chokepoint between two objective houses, Michael forces heroes to take long detours through open streets or abandon objectives entirely. The central street corridor is the prime control point because it connects the north and south residential zones — holding it splits the hero team and makes coordinated escapes nearly impossible.
| Michael Position | Zone Controlled | Hero Counterplay | Risk for Michael |
|---|---|---|---|
| Central intersection | North/south rotation | Use hedge maze bypass | Long sightlines expose hero movement |
| Doyle house yard | North residential exits | Exit through basement window | Heroes may group for rescue |
| School hedge edge | East/west street flow | Break line of sight inside maze | Tight corners favor heroes |
| Wallace basement | South block objective | Abandon objective temporarily | Time wasted if hero leaves |
The key to Michael's map control is patience. Chasing a hero through the hedge maze wastes time and gives other heroes room to complete objectives. Instead, Michael should hold the high-value zones and force heroes to make the first move. This positional pressure compounds as police patrols tighten the map in the later stages.
Using Breakable Elements to Shape the Map
Michael can break certain environmental elements — fences, windows, and some doors — and this changes the map's geometry permanently for the rest of the match. Breaking a backyard gate removes a hero escape path, while smashing a ground-floor window creates a new entry point that Michael can use for faster rotations. Smart Michael players break elements selectively, closing off the most valuable hero routes while leaving themselves faster traversal options.
This destruction system means the map is never exactly the same twice. A hero who planned to exit through a specific backyard gate may find it blocked by Michael's earlier destruction, forcing an improvised route through a more dangerous street. The dynamic nature of the Haddonfield map rewards players on both sides who adapt to the changing environment rather than relying on a fixed mental layout.
Haddonfield Streets Guide: Landmarks and Callouts
Clear communication between heroes depends on shared map callouts — short names for landmarks that everyone recognizes. The community has settled on a set of common callouts based on the film's locations and the game's most distinctive structures. Learning these callouts is the fastest way to turn a chaotic chase into a coordinated escape.
Essential Callout Names for Solo and Group Play
The most useful callouts reference locations that are visible from multiple angles or carry unique silhouettes. The Doyle house is the primary north-end landmark, while the Wallace residence anchors the south block. The hedge maze is the single most recognizable feature on the school grounds, and the central intersection marks the busiest chokepoint on the map. Heroes who call these names during a chase give their teammates actionable information without needing to describe street names or compass directions.
| Callout | Zone | Why It Matters |
|---|---|---|
| Doyle | North Residential | Primary landmark, staircase bottleneck |
| Wallace | South Block | Basement objective and hiding spot |
| Hedge Maze | School Grounds | Best sightline break on map |
| Central Intersection | Mid-Map | Main chokepoint, high Michael traffic |
| Parked Cars | Central Streets | Cover and vault points |
| Back Shed | South Block | Exit route and weapon spawn |
These callouts work best when paired with a direction or status — "Michael at central intersection, heading north" tells a hero everything they need to know in five words. The Haddonfield streets guide is not just about knowing where things are; it is about sharing that knowledge efficiently under pressure.
Routes Between Key Objectives
Objective-based routing is the practical application of map knowledge. When the phone spawns in the Doyle house and a weapon spawns in the Wallace basement, a hero needs to cross the map efficiently without exposing themselves on the central streets. The safest cross-map route typically runs along the east side through the school grounds, using the hedge maze as a midpoint cover before emerging near the south block.
The west side offers a faster but riskier alternative — a straight shot down the side streets with fewer sightline breaks but less travel time. Heroes should choose their route based on Michael's last known position and the current police patrol stage. Early in the match, the west side sprint is viable. Once patrols escalate and Michael has established zone control, the longer east side route through the school becomes the smarter play.
For a deeper look at how hero abilities interact with these map routes, the hero abilities guide covers which loadouts perform best on tight interior spaces versus open street chases. On Haddonfield’s dense residential grid, ambush-style heroes like the Shape’s stealth build can lock down narrow fence gaps and garage shortcuts, while chase-oriented loadouts fall off sharply once a survivor breaks line of sight across backyards and hedgerows. Conversely, the long straightaways along Lampkin Lane and the park perimeter favor speed-focused kits that maintain pressure during open road pursuits, making your route choice before the first objective almost as decisive as the ability picks themselves.
Map Tips for Weapon Optimization and Survival
The Halloween: The Game maps system ties directly into weapon acquisition and survival strategy. Heroes who understand where weapons spawn, how to reach them safely, and when to abandon a weapon route for a pure escape play will consistently outlast players who treat every match as a sprint to the nearest exit marker.
Weapon Spawn Priority and Route Planning
Not all weapon spawns are equal. A kitchen knife in the Doyle house is easier to reach than a crowbar in the Wallace basement, but the basement spawn offers better ambush potential if Michael commits to a chase. Heroes should evaluate weapon routes based on three factors: current proximity, Michael's known position, and the police patrol stage. Grabbing a weapon early is valuable, but only if the route does not force a crossing through the central intersection during a high-pressure window.
| Weapon Type | Common Spawn Zone | Best For | Route Risk |
|---|---|---|---|
| Kitchen knife | House kitchens | Quick defense | Low |
| Crowbar | Basements, sheds | Stagger potential | Medium |
| Improvised blunt | Garages, hallways | Slowing Michael | Medium |
| No weapon (escape focus) | N/A | Pure survival | Low |
Heroes should remember that a weapon is a tool for buying time, not a solution to Michael. The best players use weapons to create separation during a chase, then continue toward an exit rather than trying to fight. For a full breakdown of weapon options and their properties, the weapons guide covers damage, swing speed, and situational value in detail.
Surviving Late-Game Patrol Escalation
The final minutes of a match are when map knowledge pays off most. With police patrols covering nearly every street and Michael holding the central zones, heroes need to shift from objective play to pure survival. The best late-game positions are the perimeter zones — the school grounds, the back alleys behind the south block, and the narrow side yards near the north residential edge. These areas offer more cover, fewer patrol lights, and multiple small loops that let a hero break Michael's line of sight repeatedly.
The hedge maze remains valuable even late, but Michael players know to camp its exits. A better late-game loop is the back alley chain behind the south block, which connects three separate fence gaps and two sheds without ever forcing a hero onto a lit street. Learning these quiet loops is the difference between escaping with seconds to spare and getting caught at a dead end.
Frequently Asked Questions
How many maps are in Halloween: The Game?
The current build features one primary Haddonfield neighborhood map with multiple distinct sub-zones, rather than several standalone maps. The official Steam page describes the 1978 suburban setting as the central stage for every match, with dynamic features like randomized weapon spawns and rotating phone locations providing variety instead of separate map rotations.
What are the best escape routes on the Haddonfield map?
The strongest escape routes chain multiple sightline breaks together, such as the south block sequence that runs from the Wallace basement through the back shed and into the school hedge maze. The hedge maze offers three separate exits into different residential streets, making it the most flexible exit point on the map.
Where do weapons spawn in Halloween: The Game?
Weapon spawns are randomized within fixed household locations, with kitchens, basements, sheds, garages, and hallways being the most common spawn zones. The spawn table rotates each match, so heroes cannot rely on one static loot path. Knowing the full spawn table lets you plan routes that balance weapon acquisition against Michael's likely patrol patterns.
How do police patrol routes affect the map?
Police patrol routes escalate in three stages, starting with perimeter-only coverage and expanding into the central intersections by the six-minute mark. Late-stage patrols light up dark corners and push Michael toward the same paths survivors use, making perimeter zones like the school grounds and back alleys safer than central streets.
Is the Haddonfield map the same every match?
The base street layout and building positions remain consistent, but dynamic elements change the map's tactical geometry each round. Michael can permanently break fences, windows, and some doors, while police patrols, weapon spawns, and phone locations rotate. This means the optimal route for one match may be blocked or unsafe in the next, rewarding players who adapt rather than relying on a fixed mental layout.